Use with SonarQube™ Developer Edition
Step 1: Create a SonarQube™ server configuration
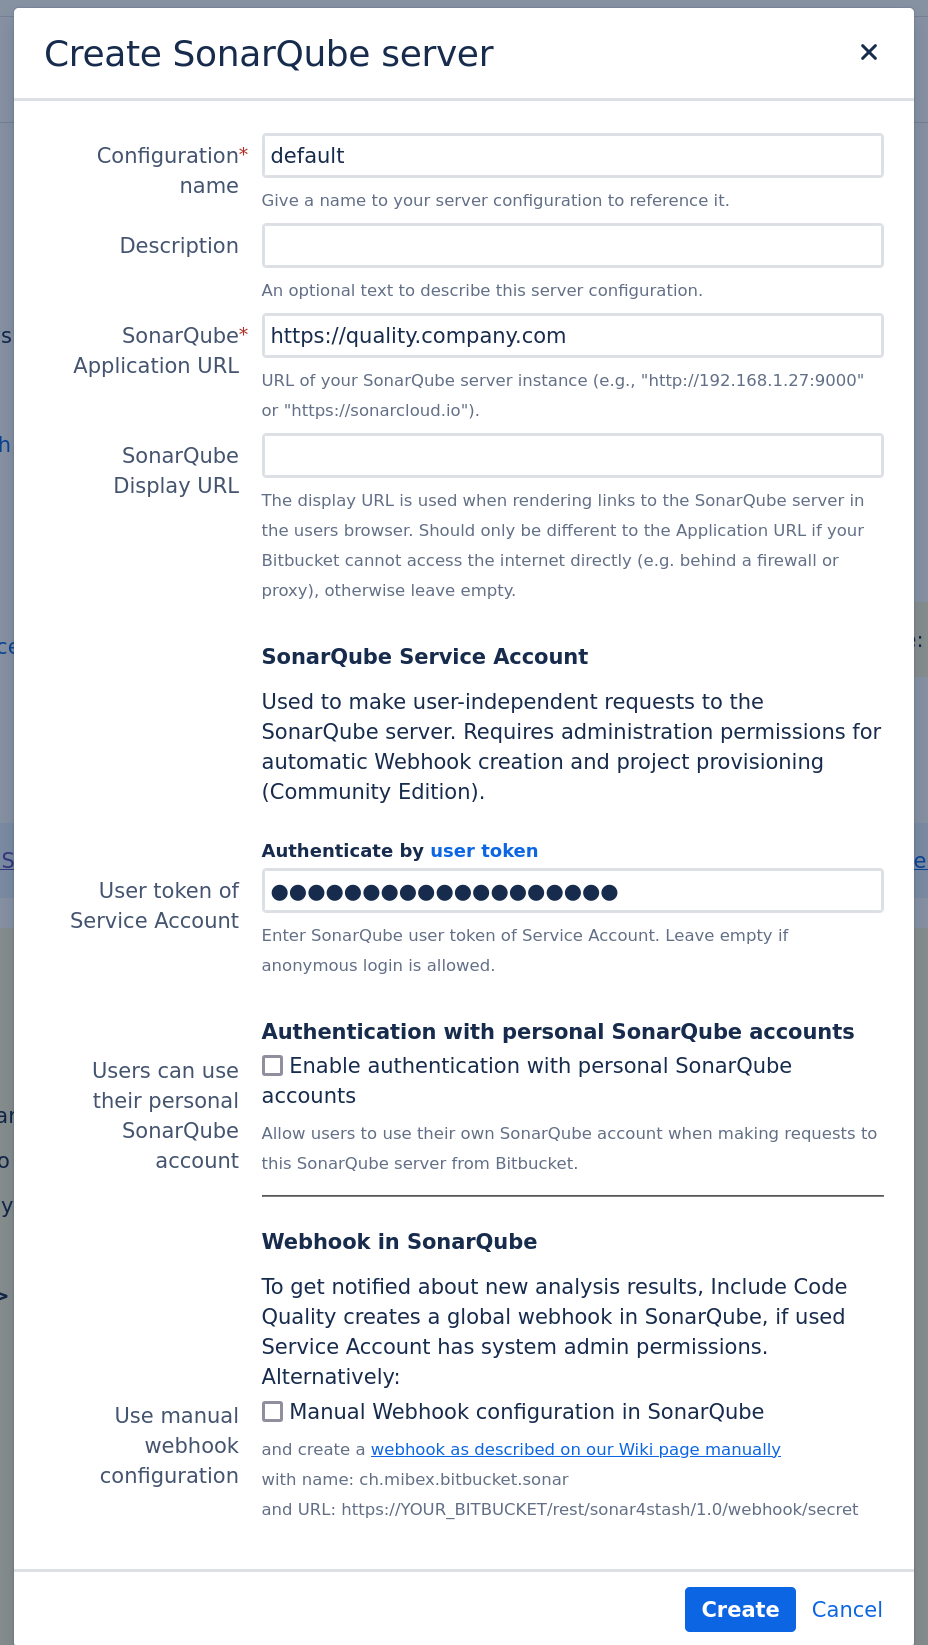
In Bitbucket, go to Bitbucket Admin → Include Code Quality and click on create a new SonarQube™ server.
To create your server:
Configure a name for the server.
Add your SonarQube™ Application URL.
Add a User Token of the SonarQube™ Service Account.
Choose if you want to enable authentication with personal SonarQube™ accounts instead of a Service User.
Using personal accounts can be useful to track user actions like resolving an issue or marking it as a false positive and easily identify who performed which action.
Choose between an automatic webhook configuration or a manual webhook configuration if you tick the corresponding checkbox.
You may only use an automatic webhook if the User Token used has Administer System permissions. You can read more on webhook configuration here.
Once a server has been configured with an automatic webhook, check if the corresponding webhook has actually been created in SonarQube™ in SonarQube™ Admin -> Configuration -> Webhooks with the name ch.mibex.bitbucket.sonar. If not, check our troubleshooting tips.
Step 2: Configure a SonarQube™ Analysis
Next step is to configure your SonarQube™ scan in your build system.
Go to the dedicated documentation page for more details on how to configure your SonarQube™ Analysis.
Once you have configured a SonarQube™ Analysis, run it to make sure the results are visible in SonarQube™.
For multiple SonarQube™ projects for the same repository: ensure the analysis results are available on each project in SonarQube™.
Step 3: Connect one or more SonarQube™ projects to a Repository
In Bitbucket, connect one or more SonarQube™ project to a Repository (Repository → Settings → Include Code Quality)
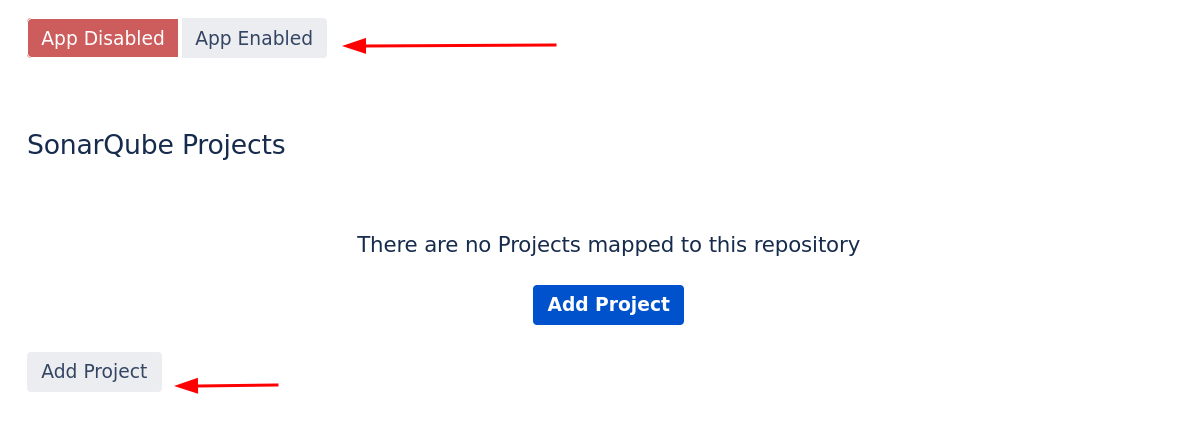
Click App Enabled, followed by Add Project.
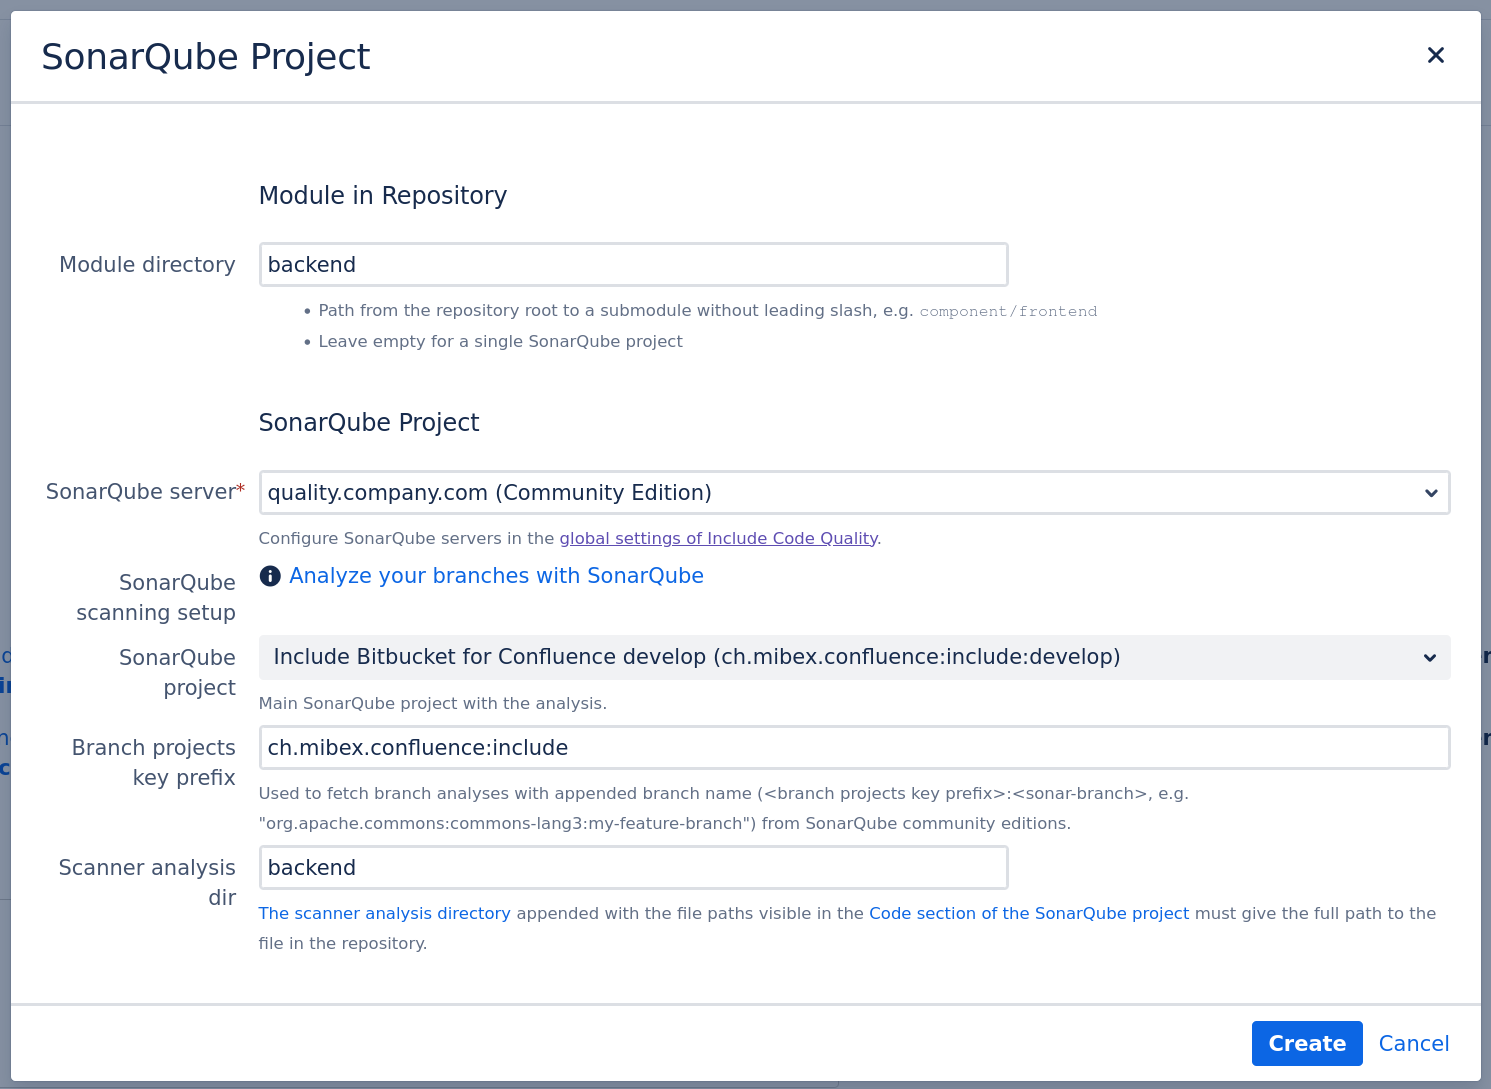
Select the Module Directory of the project. Leave empty for a single SonarQube™ project in the repository. Select a subfolder of the repository if you want to configure multiple SonarQube™ projects for the same repository (for example if you are working with a monorepo strategy).
Select the appropriate SonarQube™ server and SonarQube™ project.
Configure the Scanner analysis directory to the path where the analysis runs. The path must start with the module directory.
Step 4: Enable Include Code Quality for Bitbucket within your repository
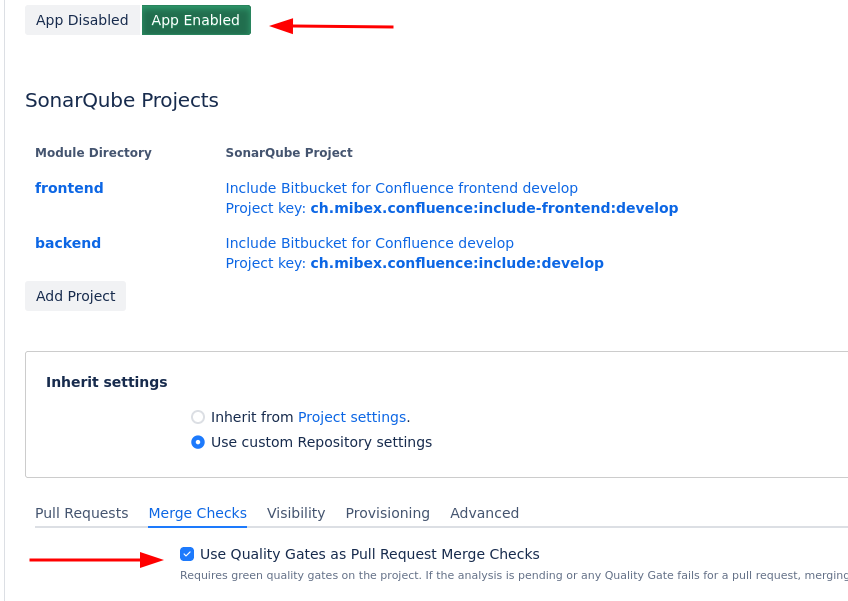
In Bitbucket, Enable Include Code Quality for Bitbucket in the settings page of your repository (Repository → Settings → Include Code Quality)
Verify you have one or more SonarQube™ projects linked to the repository.
Toggle the App Enabled button.
Optional: Configure additional settings in the tabs if required.
 enable Merge Checks based on SonarQube™ quality gates to enforce high code quality:
☑ Use Quality Gates as Pull Request Merge Checks.
Step 5: Check if the SonarQube™ analysis is included in the main branch
In Bitbucket, go to Repository → Source View of the already analyzed main branch. You should see the issue annotations:
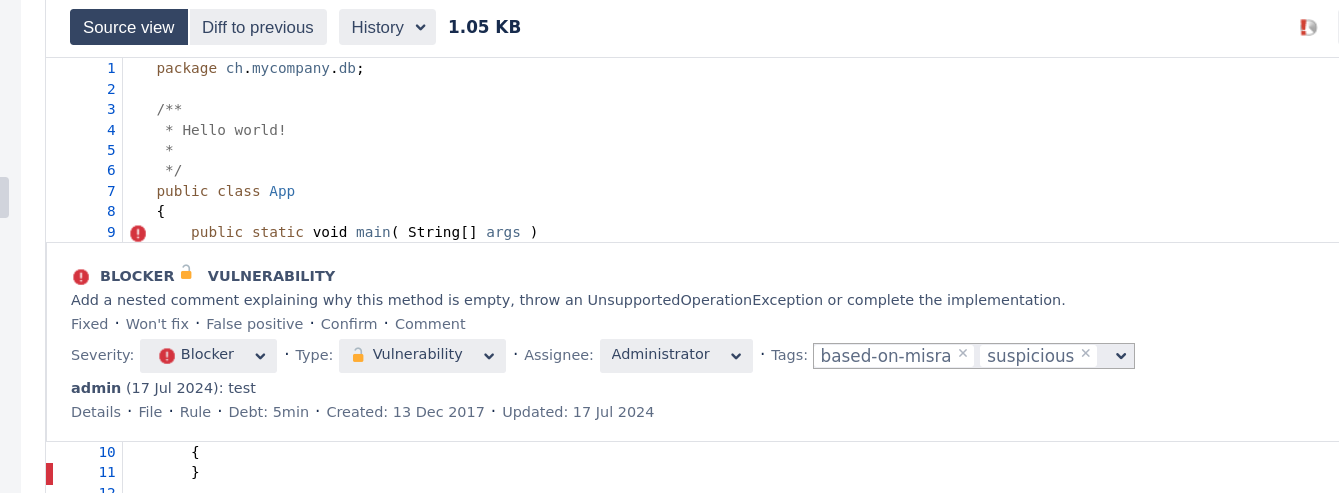
If you cannot see SonarQube™ issues or test coverage in here, please follow our configuration checklist to find out what went wrong.
Step 6: Create pull request and check if the SonarQube™ analysis is included
Create a new branch and add a commit with some issues in it. Create a pull request from that branch.
Your SonarQube™ Analysis Configuration should pick up the new pull request and analyze it correctly.
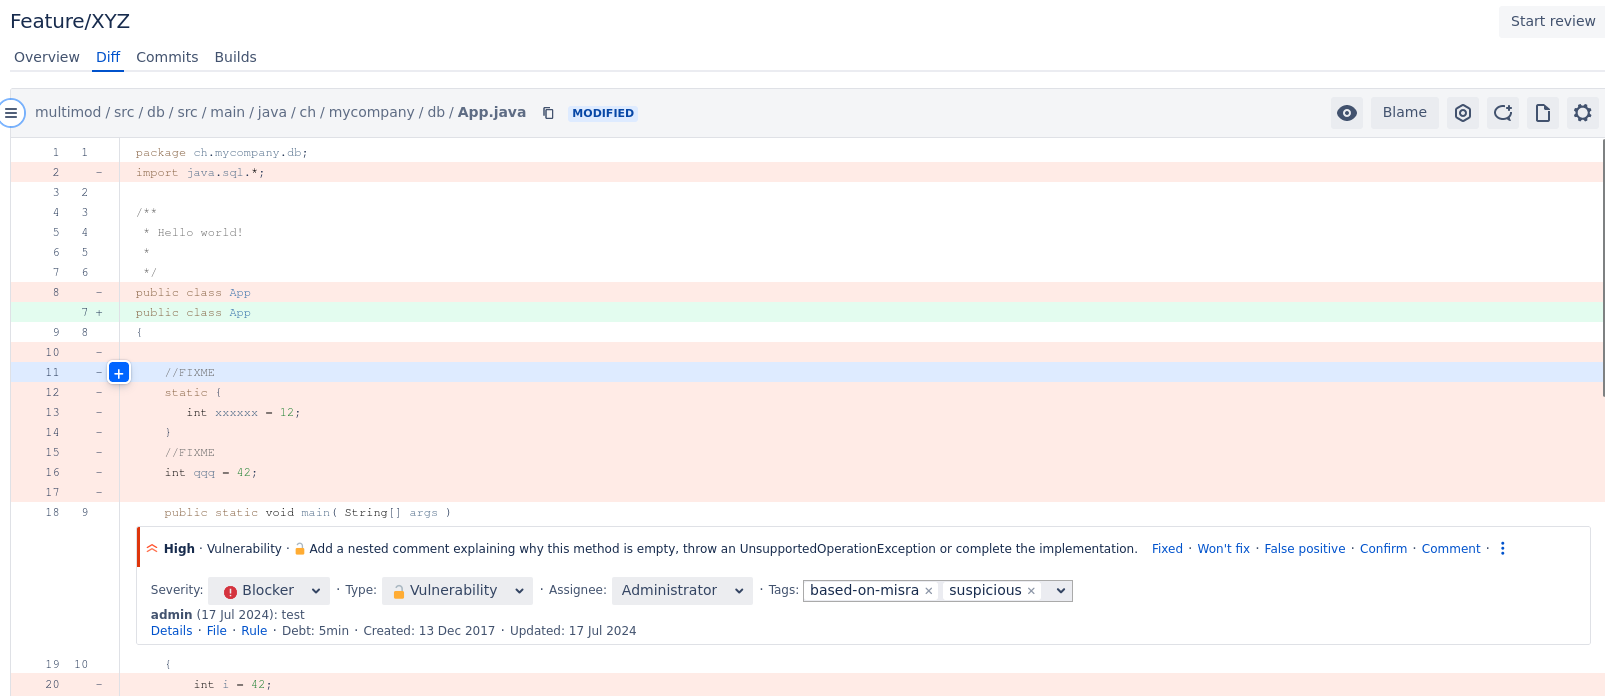
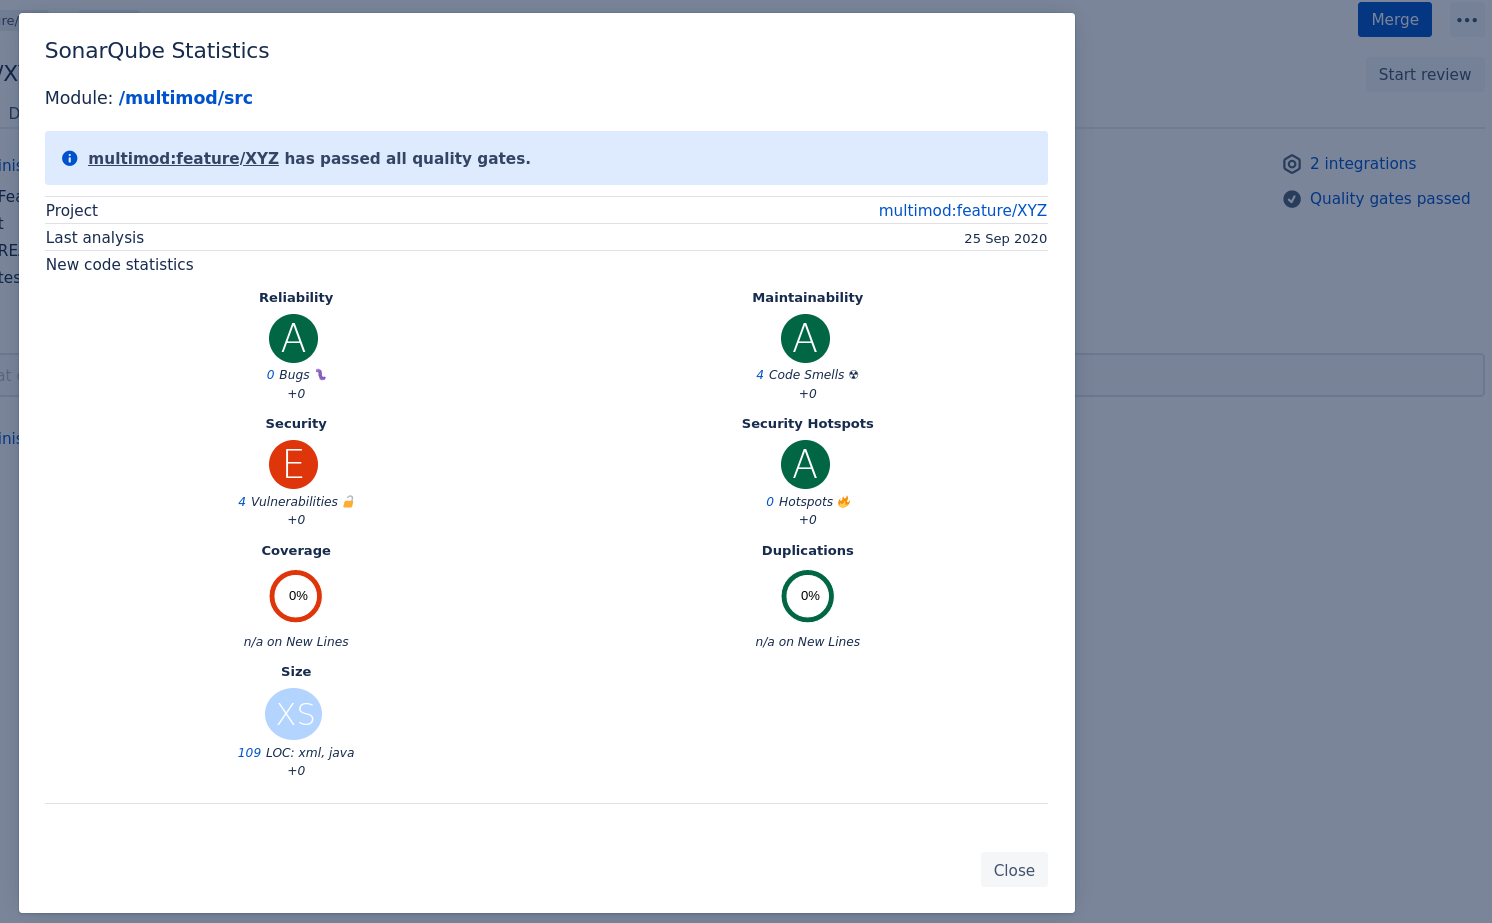
If you cannot see SonarQube™ issues or test coverage in here, please follow our configuration checklist to find out what went wrong.
SONAR™, SONARQUBE™ and SONARCLOUD™ are independent and trademarked products and services of SonarSource SA: see http://sonarsource.com , http://sonarqube.org , http://sonarcloud.io .
