Configuration
The steps below will guide you through the configuration needed to include files from a GitHub instance.
You can register multiple GitHub instances, for example http://github.com and some company internal enterprise instance github.your-company.com.
Personal OAuth Authentication
Every Confluence user needs to authenticate via OAuth to this GitHub site in order to access included private repository files. They must have a GitHub account as well. They only see private files they see on your Github site as well.
Step 1: Get configuration information for the app in Confluence
Within Confluence, navigate to the app configuration panel (‘General Configuration’ → Include GitHub) to obtain the configuration information needed to register the app in GitHub. A configuration guide will be provided in this panel.
.png?inst-v=82303ff1-654a-461c-bbca-d34ff5f47064)
Step 2: Register the app as an OAuth app in GitHub
You need to register the app as an OAuth app in GitHub:
Navigate to the organization where Include GitHub for Confluence should be registered.
Navigate to the organisation settings to register a new OAuth app (Found under Settings → Developer Settings → OAuth Apps).
Enter the information obtained from the Include GitHub for Confluence app settings in Step 1.
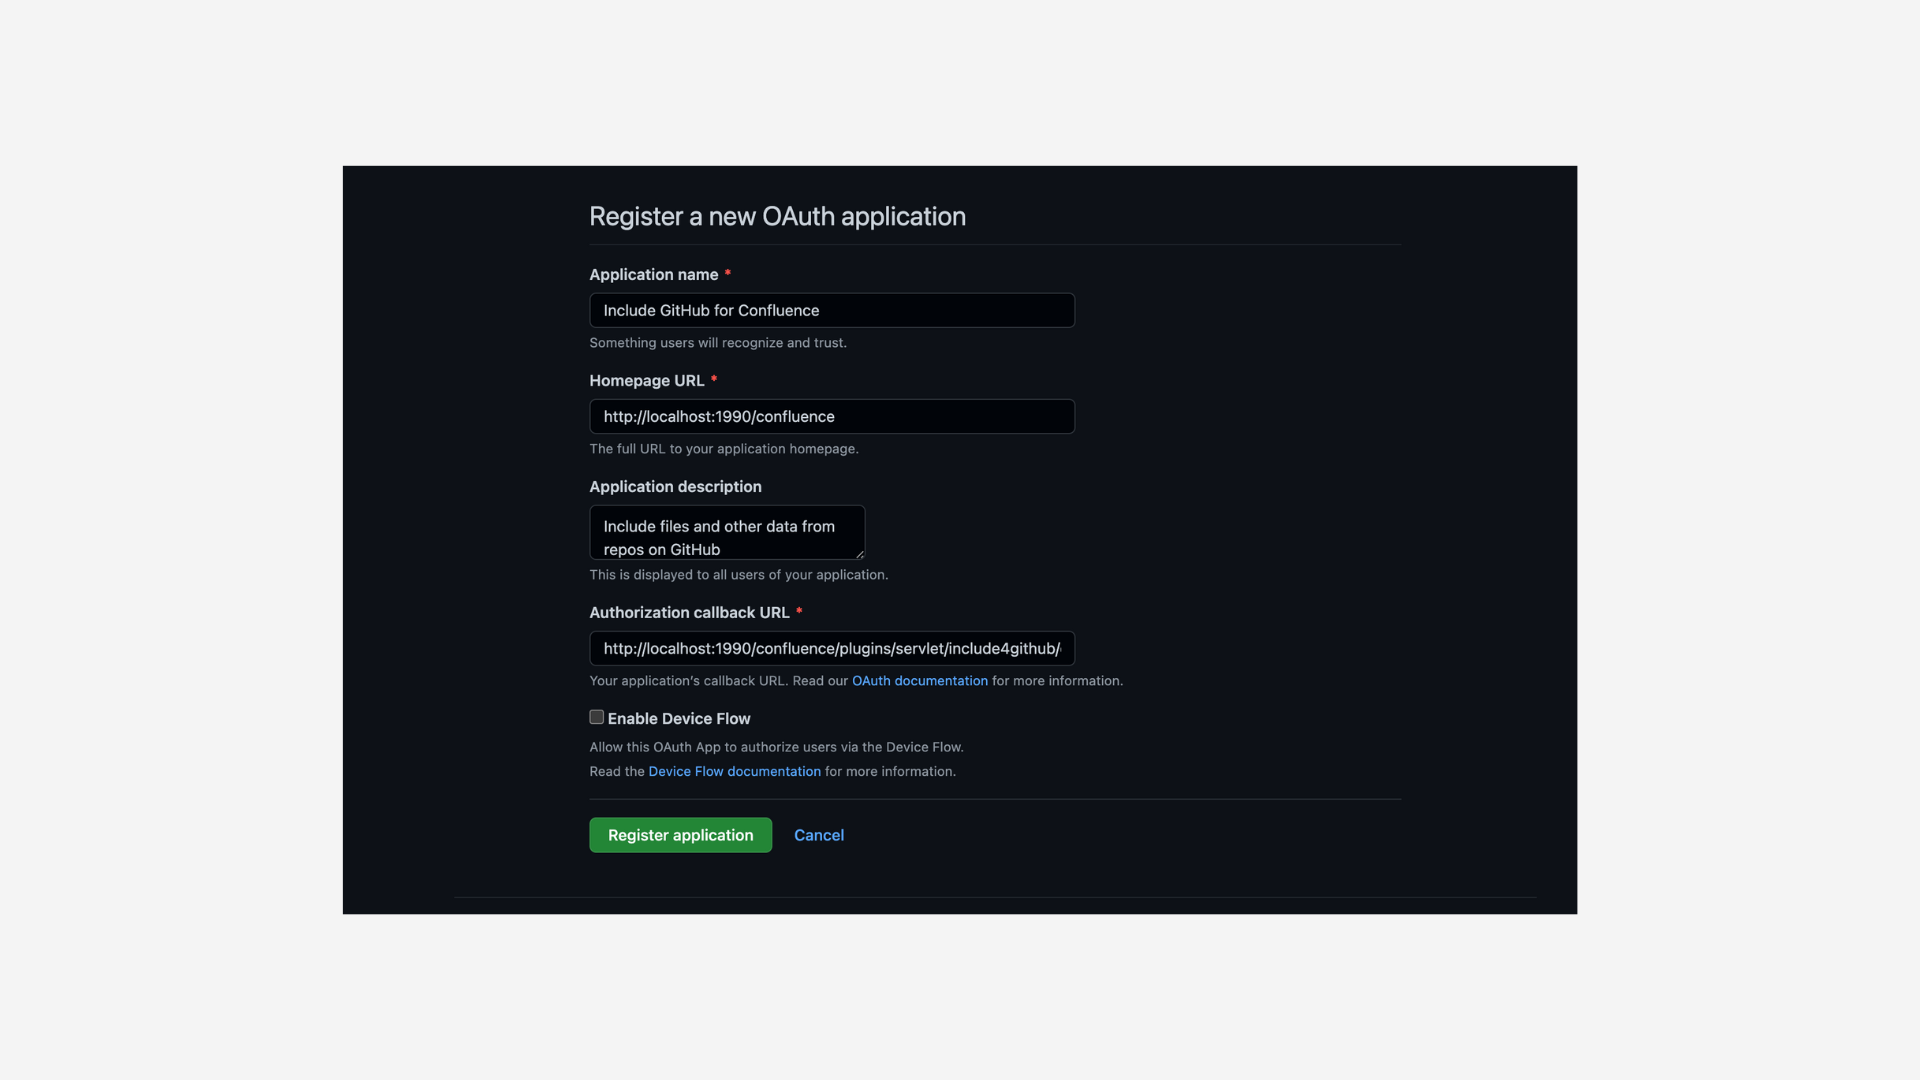
Complete the registration and create a client secret.
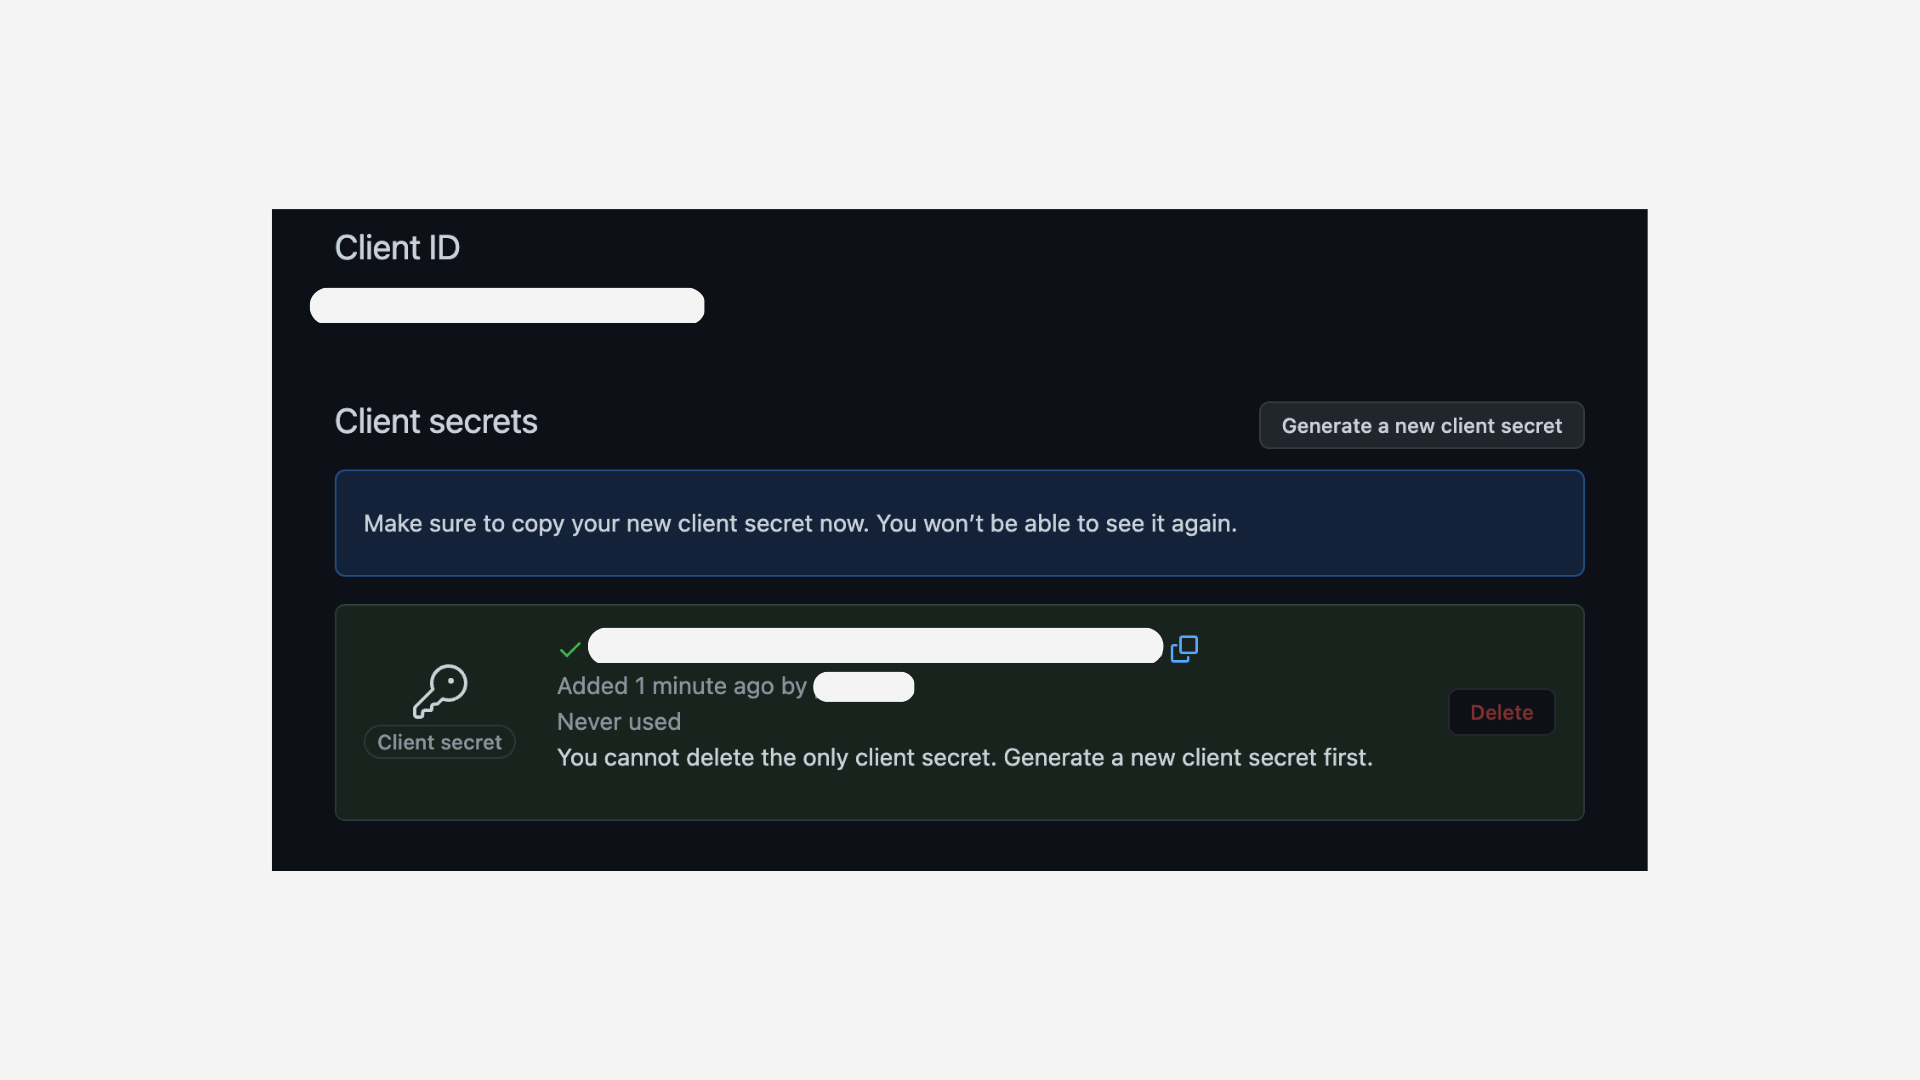
Copy the client id and client secret that will be used for the app config in Confluence.
Step 3: Add the GitHub credentials in the app configuration panel
Within the app config panel from step 1, add the GitHub instance url, client id and client secret obtained in step 2.

Step 4: Access GitHub content through the macro
You will now be able to add files from your GitHub instance through the macro. Users will simply need to authenticate with the GitHub instance (so that user can only view files for repos that they have permissions for).
The file will be rendered for the user if he has the relevant permission to access it.
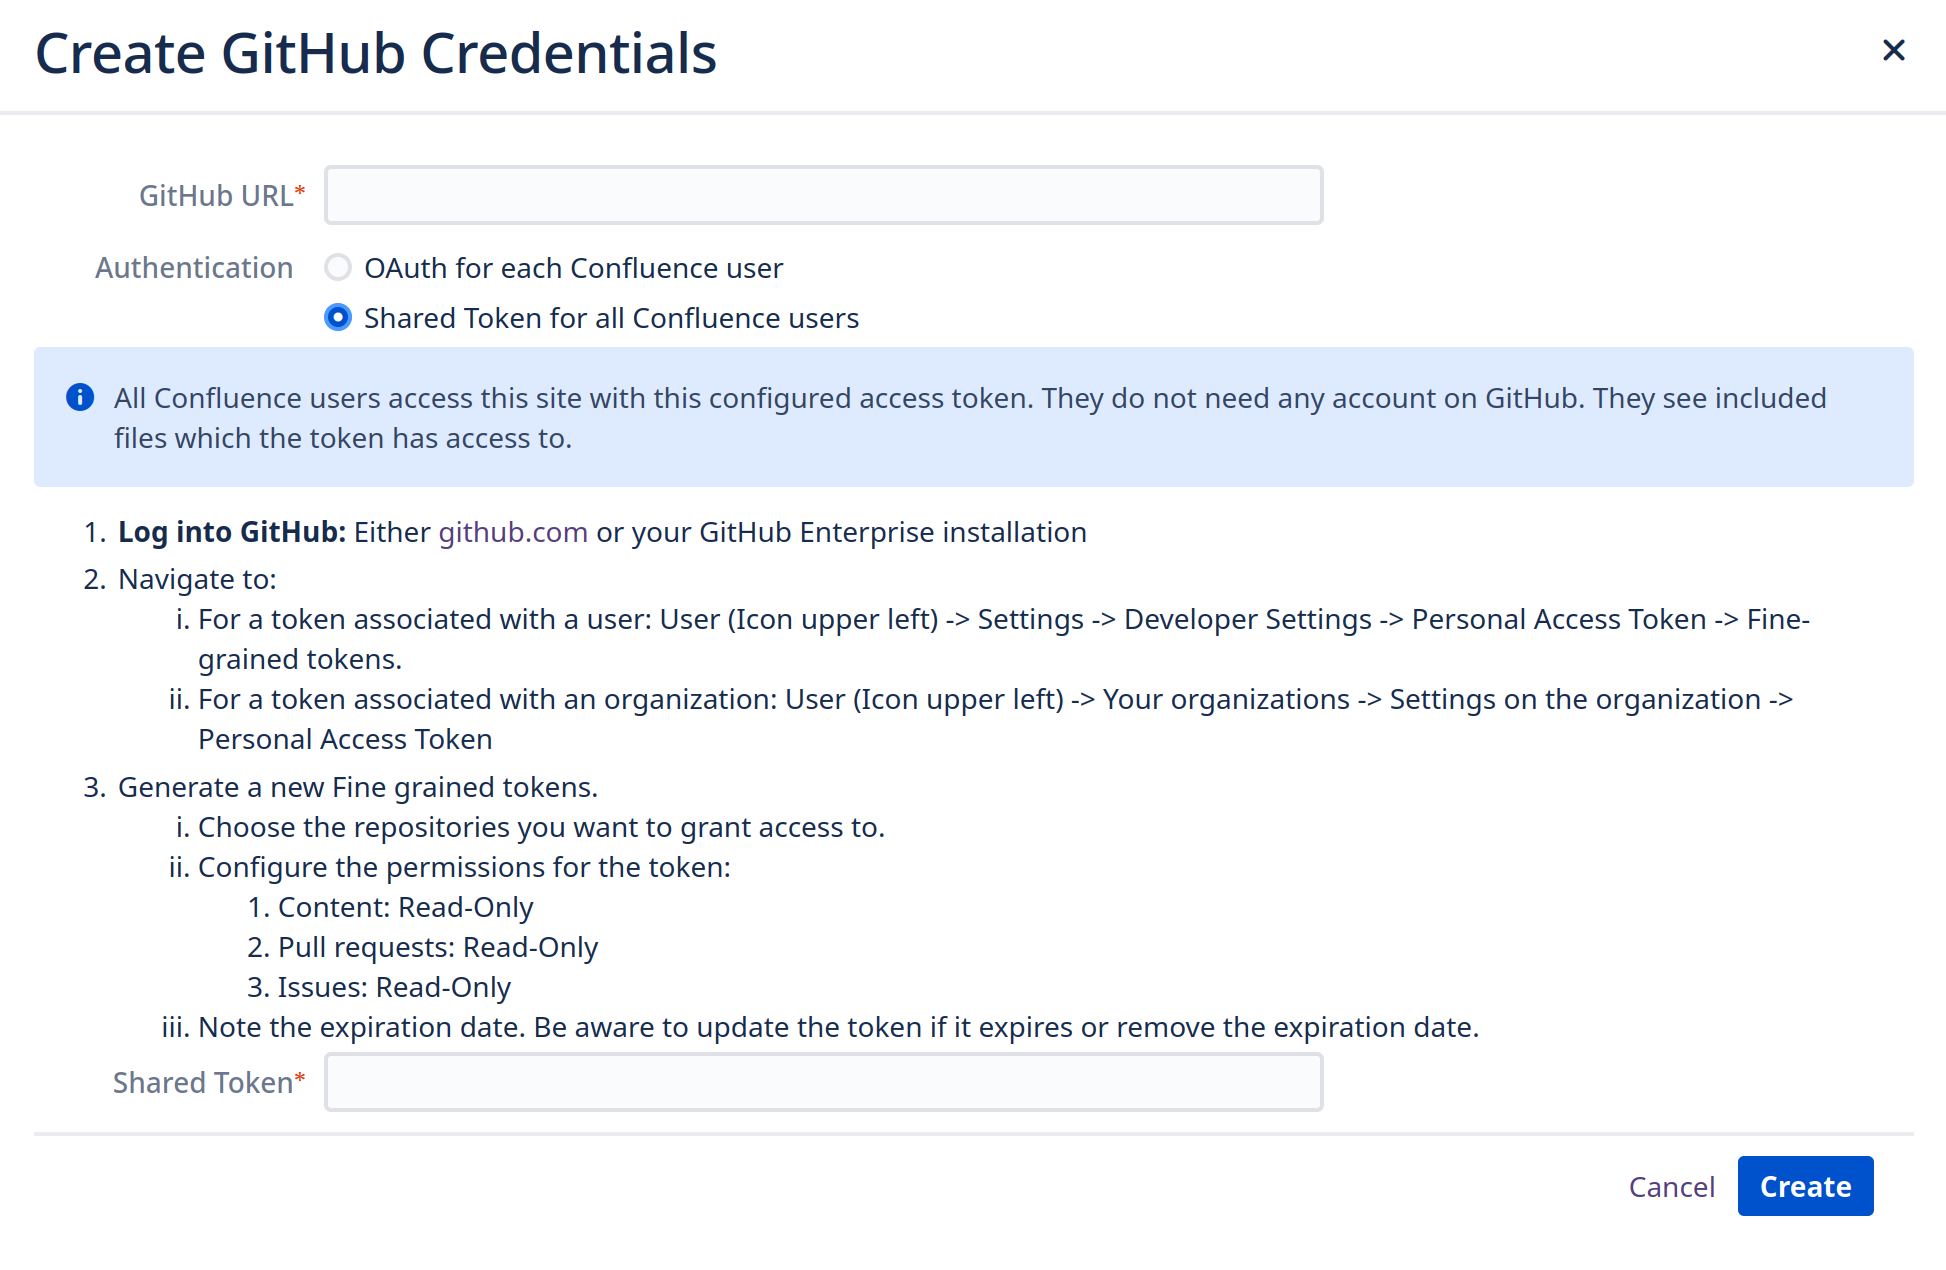
Shared Access Token
All Confluence users access this site with this configured access token. They do not need any account on GitHub. They see included files which the token has access to.
1. Create the Access Token
Log into GitHub: Either github.com or your GitHub Enterprise installation
Navigate to:
For a token associated with a user: User (Icon upper left) -> Settings -> Developer Settings -> Personal Access Token -> Fine-grained tokens.
For a token associated with an organization: User (Icon upper left) -> Your organizations -> Settings on the organization -> Personal Access Token
Generate a new Fine grained tokens.
Choose the repositories you want to grant access to.
Configure the permissions for the token:
Content: Read-Only
Pull requests: Read-Only
Issues: Read-Only
Note the expiration date. Be aware to update the token if it expires or remove the expiration dat
2. Add the GitHub access token to configuration panel
Add the created access panel to the app configuration: