Connect to Bitbucket Data Center ☁️
You can add data from one or several Bitbucket Data Center instances. For each instance, follow the instructions below.
Requirements
To include data from Bitbucket Data Center, it must fulfill these requirements:
It must be reachable via a public DNS entry and IP.
It must use HTTPS.
The HTTPS certificate must be valid. Self signed certificates or certificates signed by your own root certificate authority are not accepted.
The firewall has to allow traffic from the public internet. Or you can choose to use a static IP, so you can white list the IPs in the firewall.
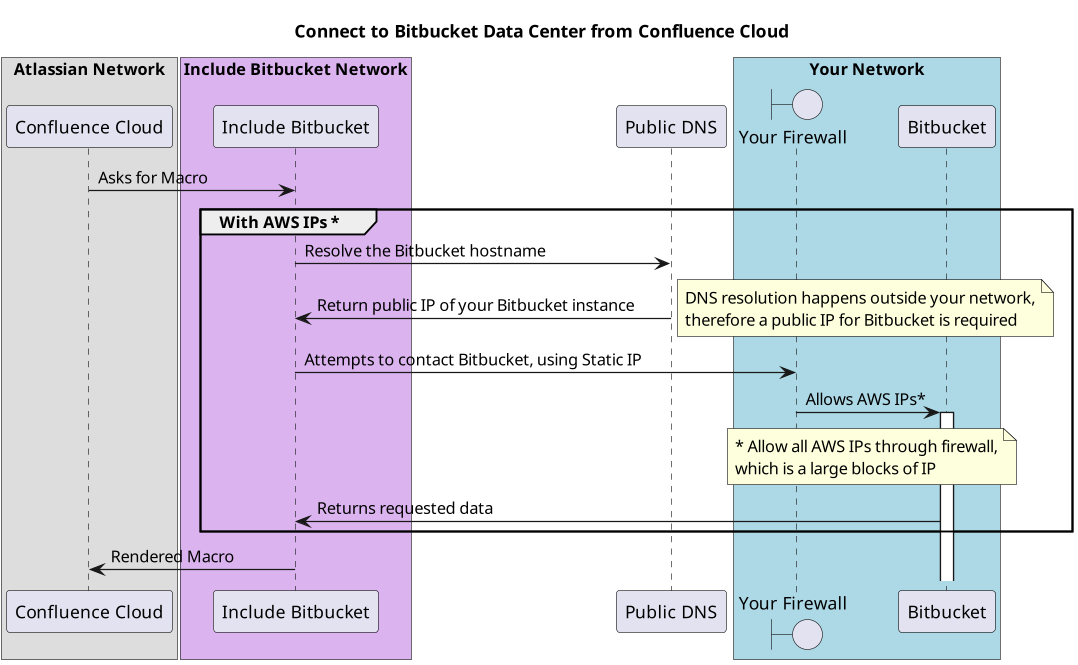
Connect to Bitbucket DC from AWS IP
When Bitbucket DC content is included in Confluence, Include Bitbucket will try to connect from the outside to your network. For that, it will find the IP via public DNS and try to connect to your Bitbucket instance. Therefore your firewall must allow traffic from the outside.
Connect to Bitbucket DC from dedicated Static IP
The 'Static IP` option will ensure that Include Bitbucket connects the specified IPs, so that your firewall can limit incoming traffic to those IPs.The Static IPs are 3.251.32.127 and 54.195.145.1. When using the static IP option, QuotaGuard is used with its privacy and security policy. Bitbucket still must have a public IP and a public DNS entry.
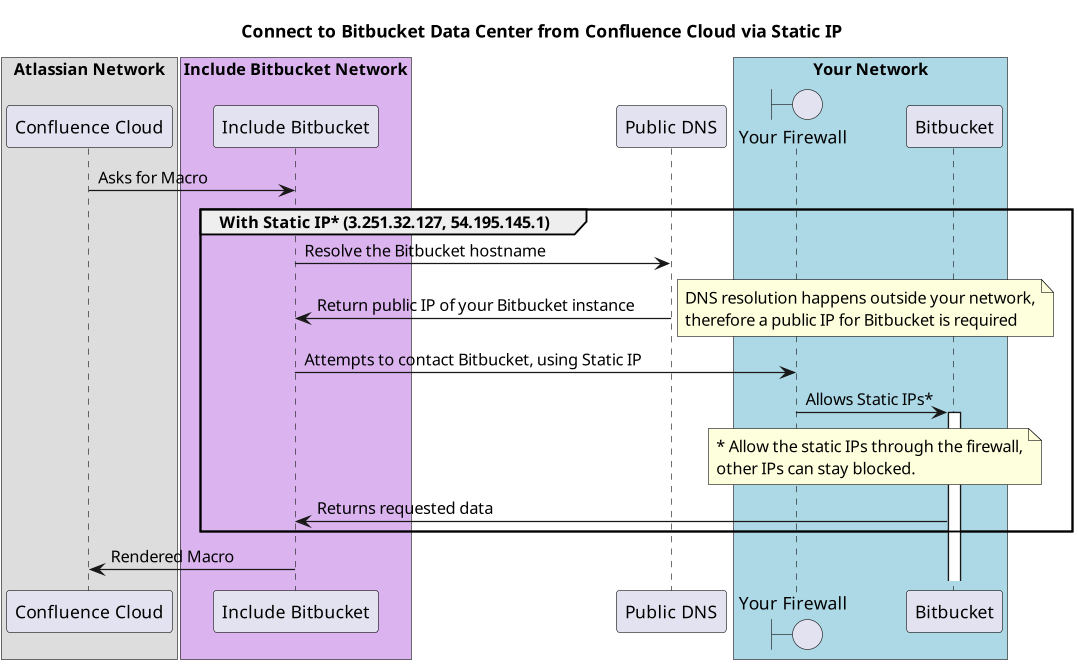
Please ensure your firewall allows incoming HTTPS traffic from these IPs on the following ports:
443(standard HTTPS)8443(alternative HTTPS)
Configuration in Bitbucket Data Center
To access files from Bitbucket Data Center repositories, use a HTTP access token.
Note that all Confluence users share this HTTP access token and view private repository content the Bitbucket Data Center user has access to.
We recommend using a user created specifically for the purpose of including data into Confluence Cloud through the macro. Avoid using an administrator Bitbucket user.
Log into your Bitbucket Data Center with the user you want to use to access data from Confluence Cloud.
Navigate to ‘Avatar on the Right Upper Corner’ → Manage Account → HTTP access tokens or Personal access tokens in older Bitbucket versions
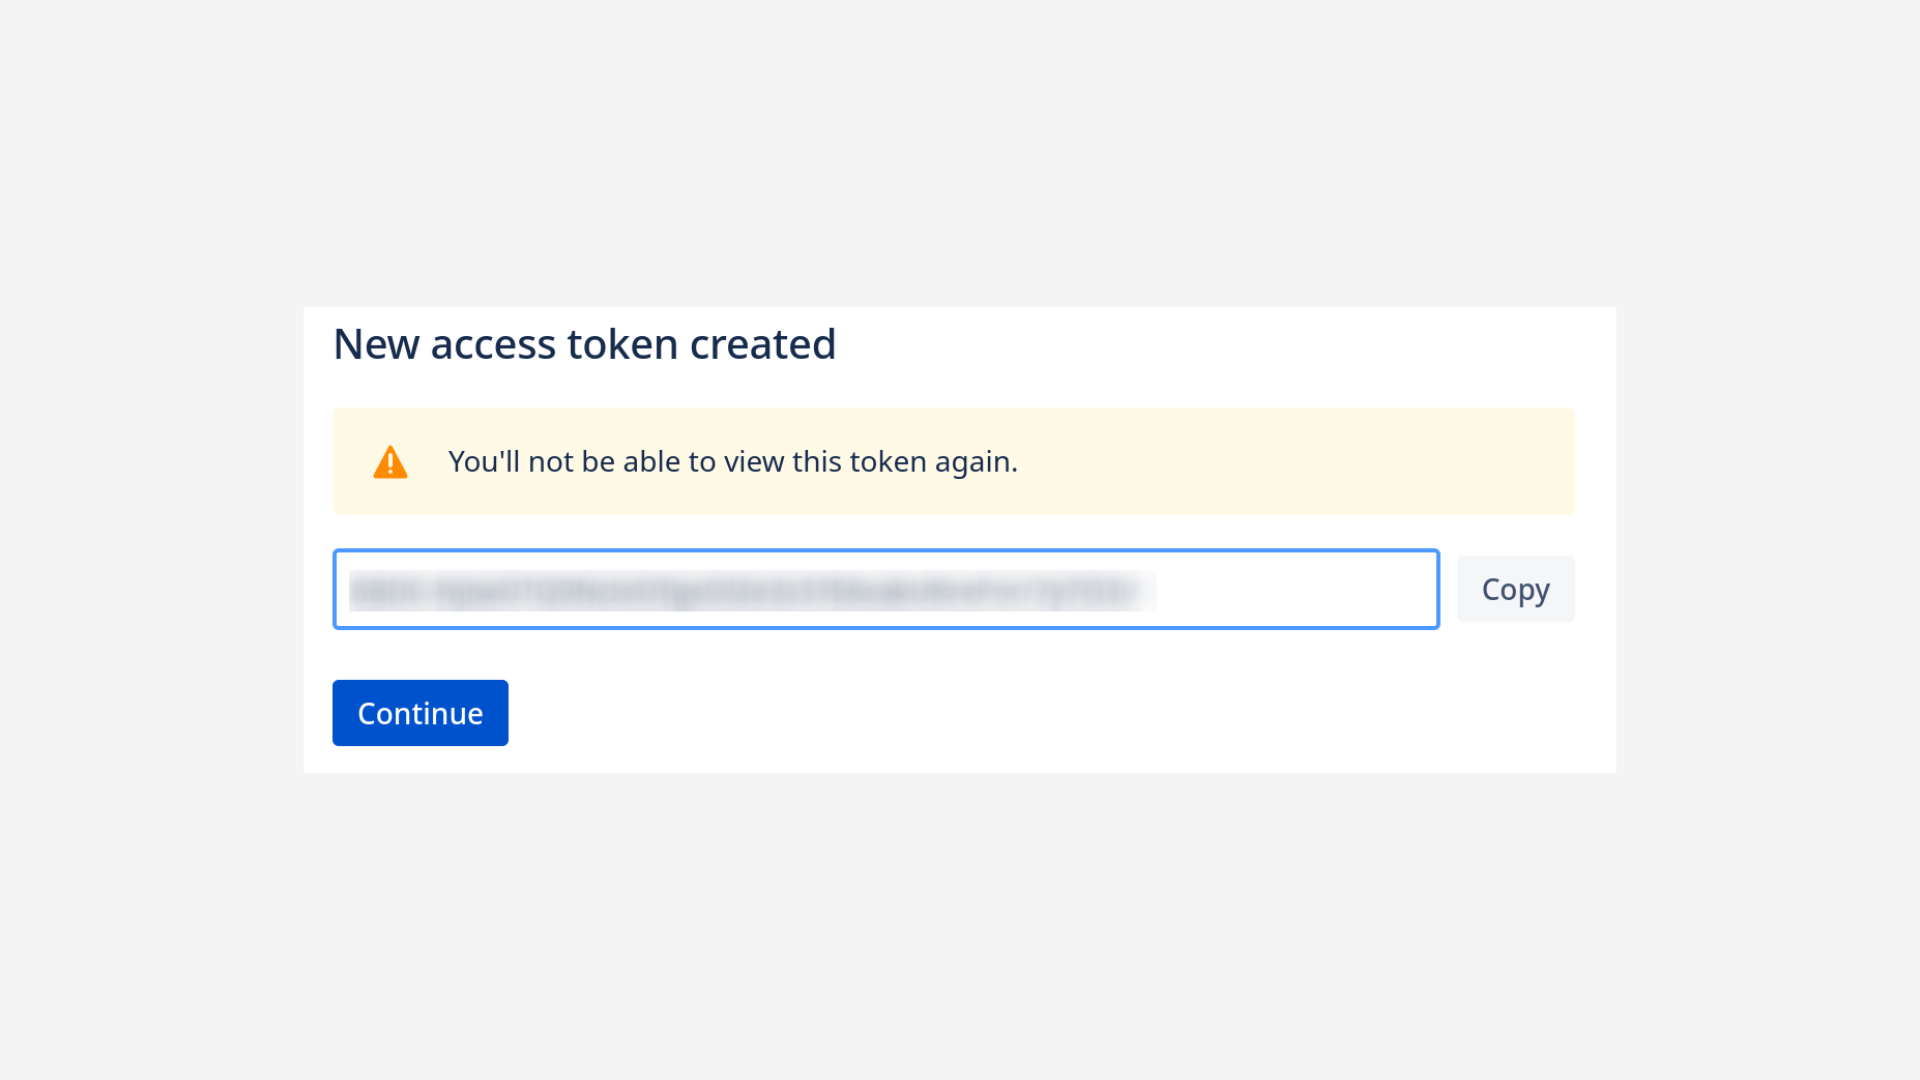
Create a new token. The default read permissions are enough. Save the token.
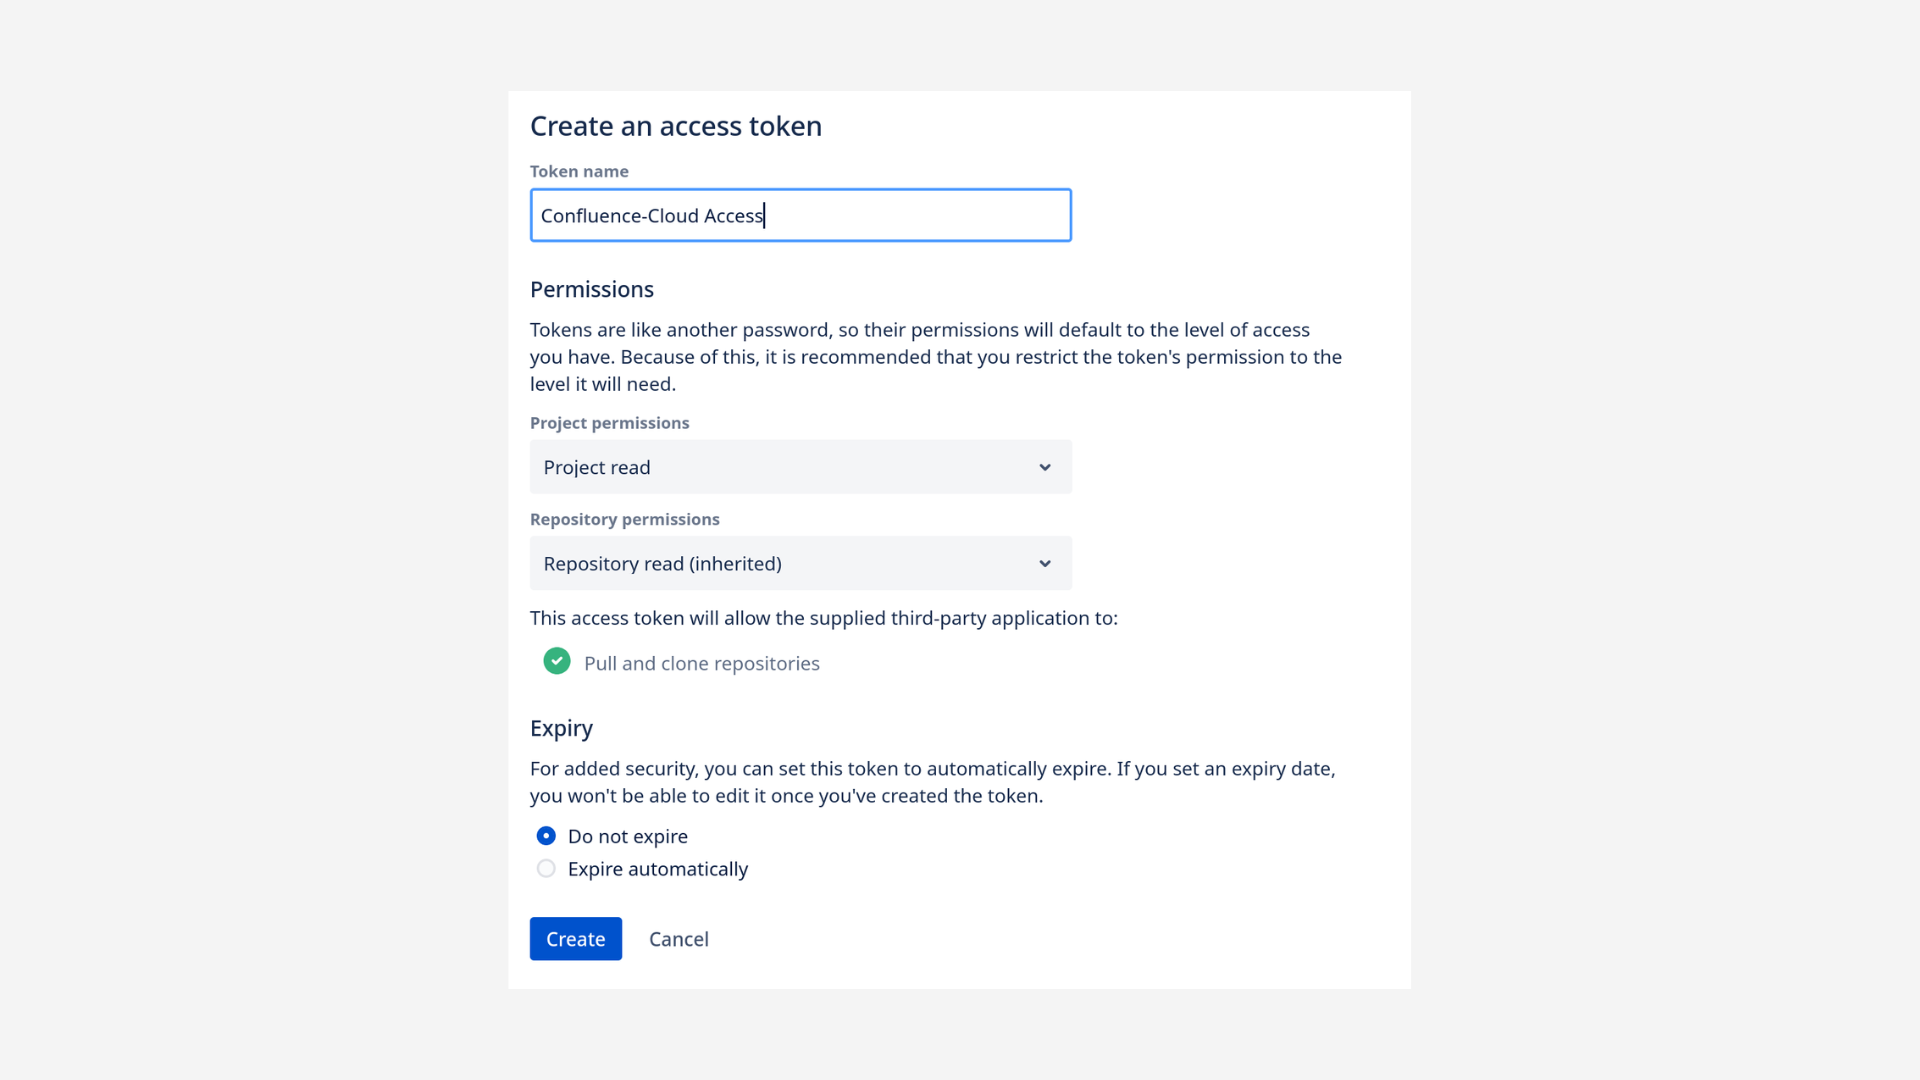
Copy the generated token. You won’t be able to see it again. If you loose it you have to revoke and recreate the token.
Configuration in Confluence Cloud
Go to Confluence Configuration → Include Bitbucket. You should then see the following page:
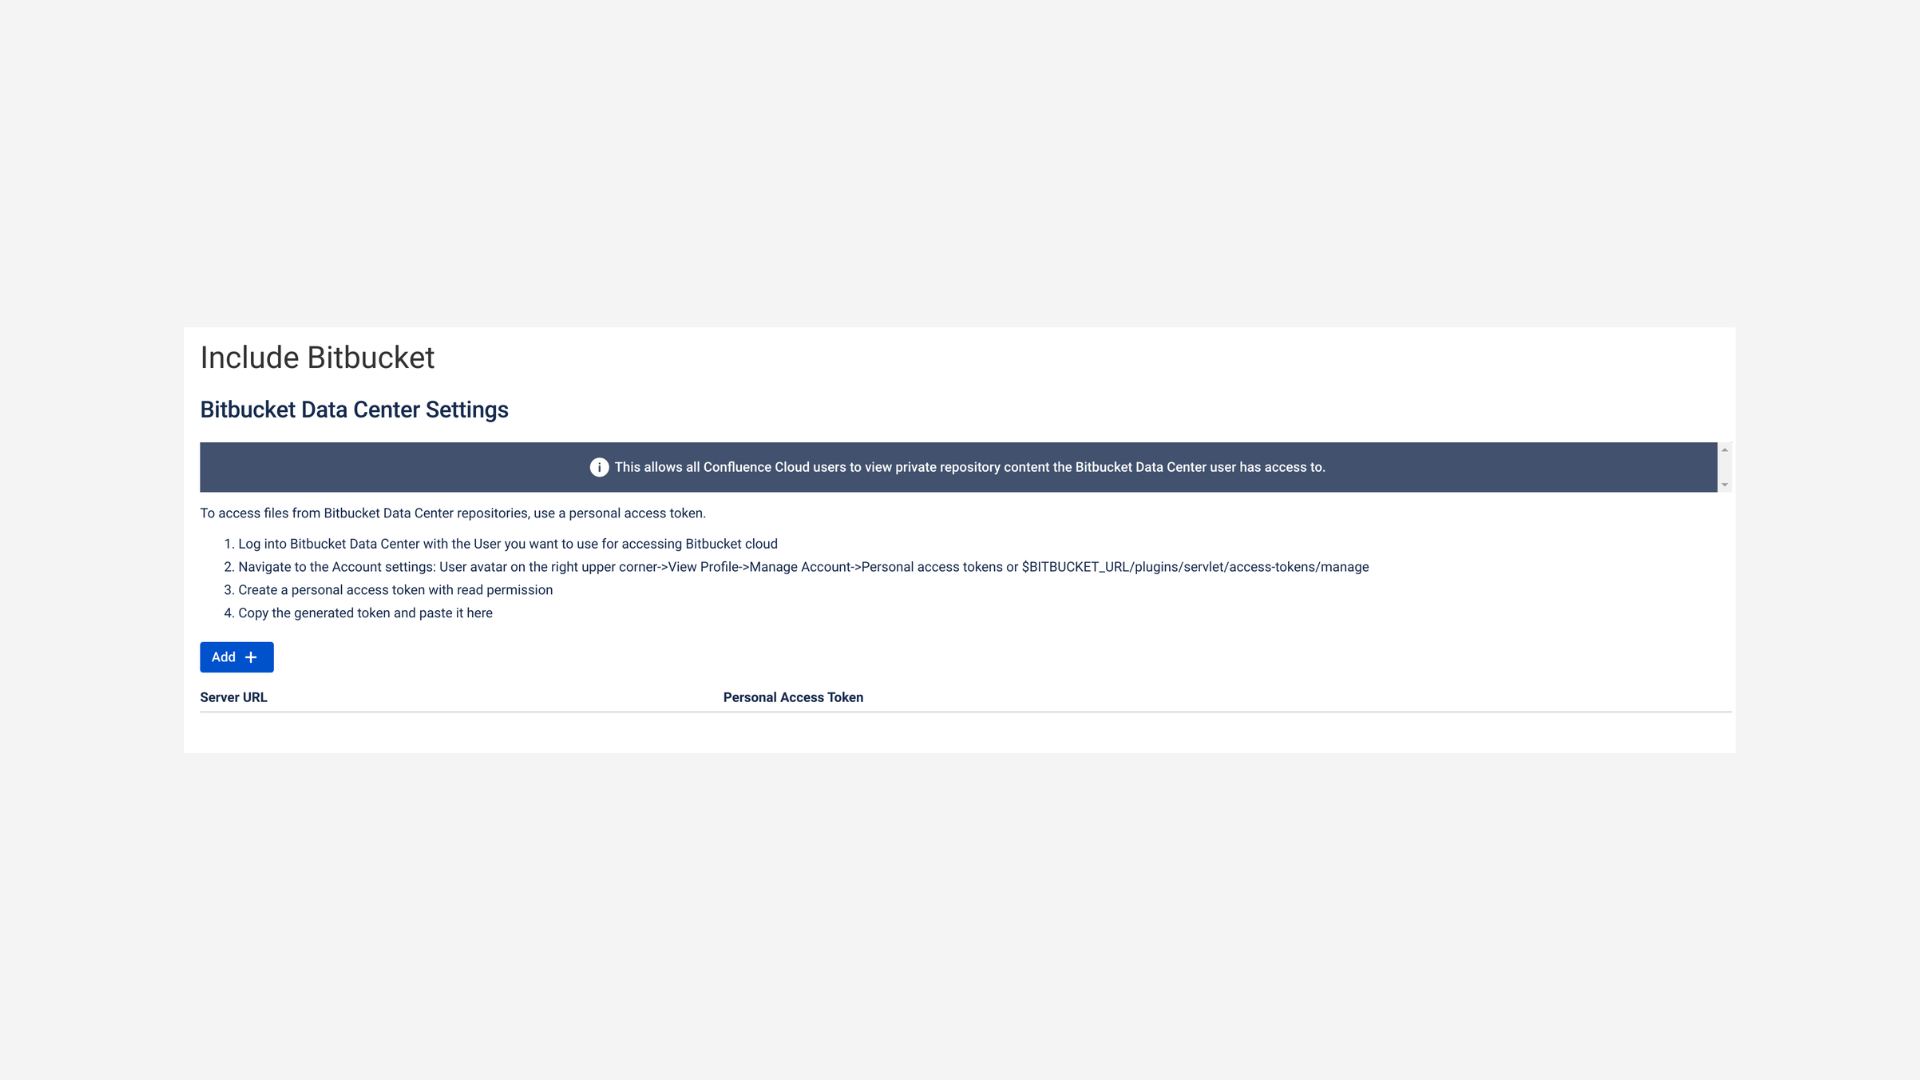
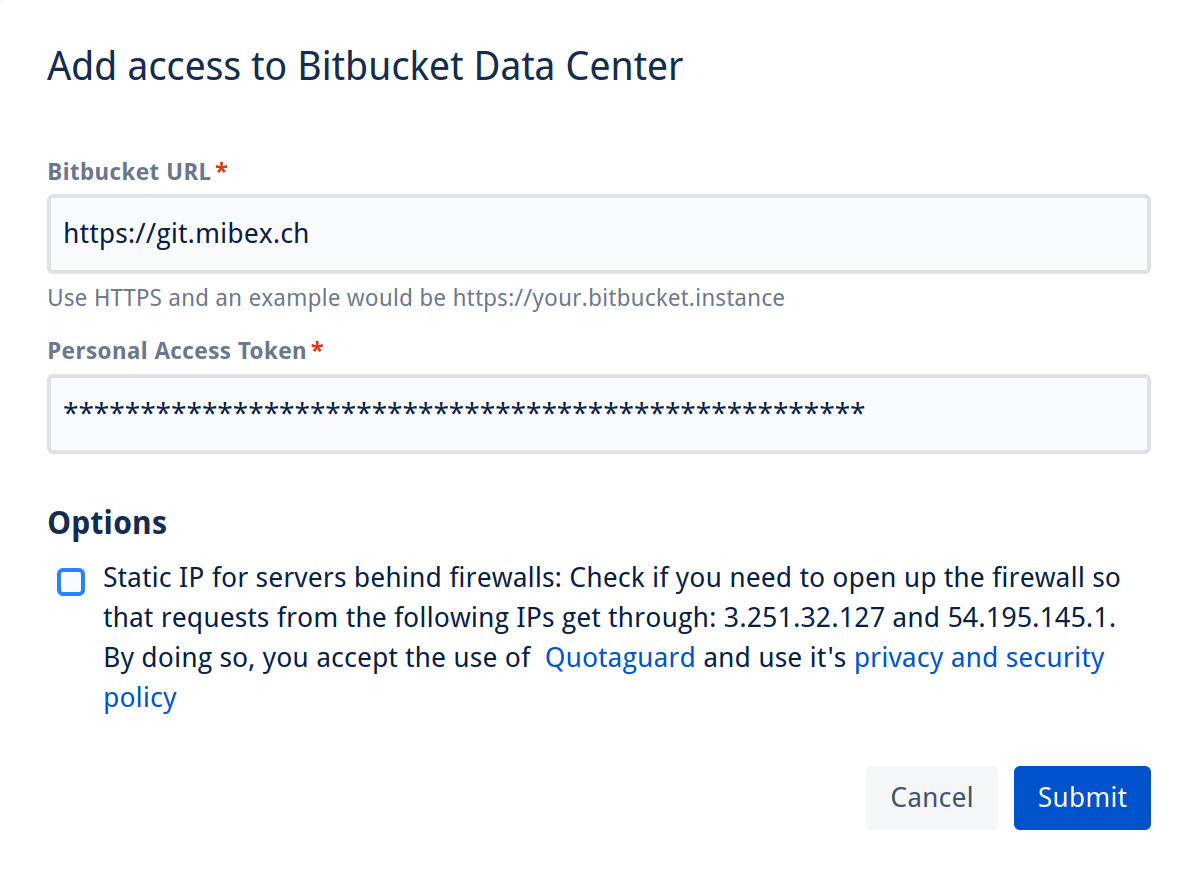
Click Add.
Add your Bitbucket Data Center URL and the HTTP access token. Then submit the configuration.
If your Bitbucket DC instance is behind a firewall, you use the ‘Static IP’ option to allow list the app. The IP’s used in this case are
3.251.32.127, 54.195.145.1. With the static IP, traffic will be routed via QuotaGuard and it’s privacy and security policy applies.Finished. Now you can include files from your Bitbucket Data Center/Server repositories.